|
One of the problems with RCT3 is
that it is very strict as to where you can place
wall pieces. The collision detection the game has
can be unusual at times, for example it will not
allow you to place walls next to paths, but will
allow you to place walls across ride tracks!
You can of course use the "M
Brookes" cheat, but this only removes some of the
restrictions, not all of them. There is a way you
can place a wall anywhere however.
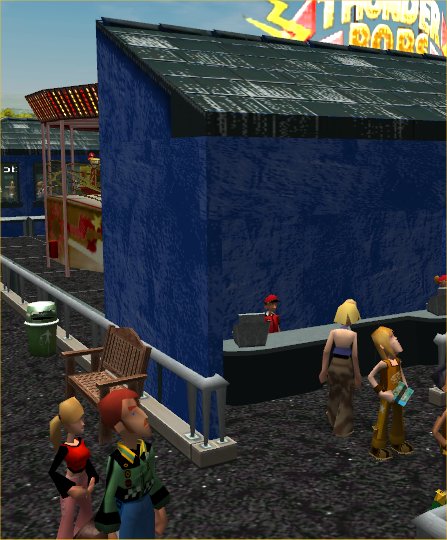
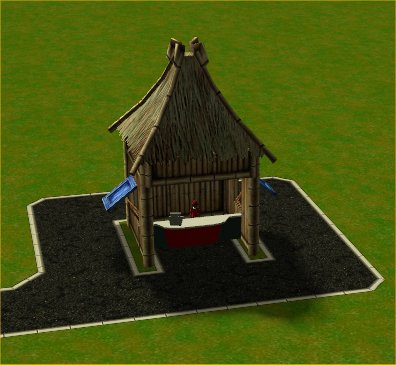
In the
"Steven's Park-Pier" video, there are several of these "Custom
Stalls" that are surrounded by walls. The games does not normally allow
you to do this.
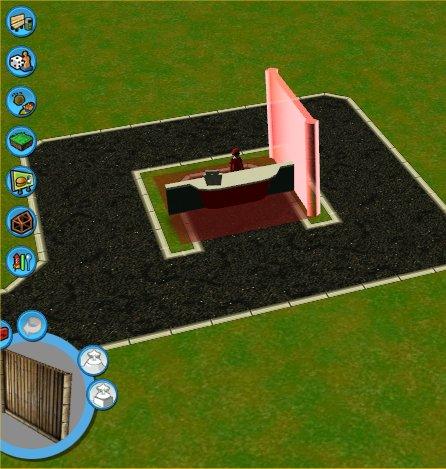
In this sandbox game, I have surrounded a
custom stall with a path. The game does not normally allow
you to place walls around it, which is a shame, as the stall
looks plain on it's own like that.
As you can see here, the
game does not allow you to place the wall piece next
to the stall.
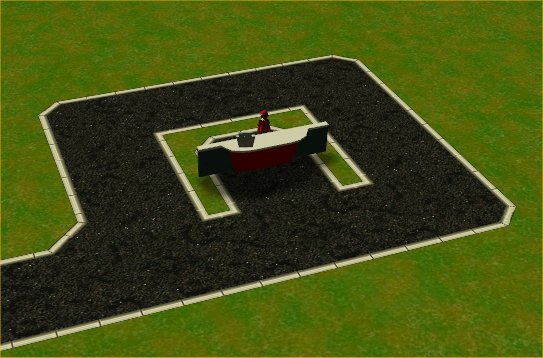
Step 1: Create Your Structure
The first step is to create the
structure you want to place, but build it elsewhere
in the park, in a clear area. Below I have built it
on a clear bit of land next to the path.
It may look unusual doing this, but all
will become clear soon.
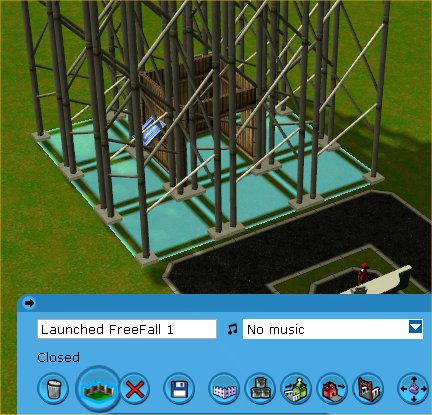
Step 2: Build A Flat Ride
The next step is to build a flat ride
above the structure, in this example I like to use the
"Launched Freefall" ride, as it does not have the same
height restrictions as some of the other flat rides.
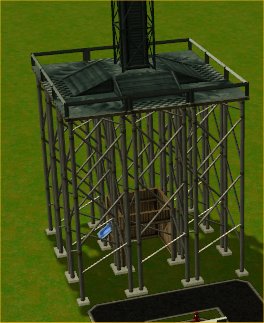
Here I have built it above my
structure, where you build it all depends on how
your structure is going to be placed.
Step 3: Save Flat Ride With Scenery
Next you have to save the flat ride with
scenery.
Select the structure, using the
"Save Scenery with ride design" feature. Save your
ride design, giving it a name you will remember.
Step 4: Delete The Flat Ride
now, simply delete the flat ride,
and if necessary, the scenery item as well.
Get ready to build the
ride-design again.
Step 5: Build The Flat Ride Design Again
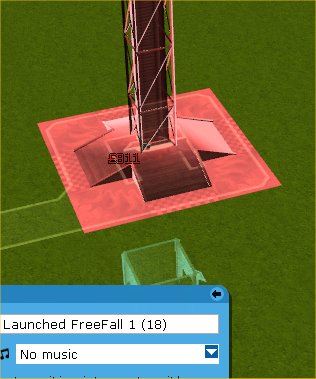
Use the "Build a saved track
design" function, and place your ride above
the stall as shown, you can see the
structure blueprint underground.
Raise the flat ride using
the shift key, until your scenery item is at
the correct height. As you can see, the
blueprint of both the ride and your scenery
item are still blue! You can now build the
item.

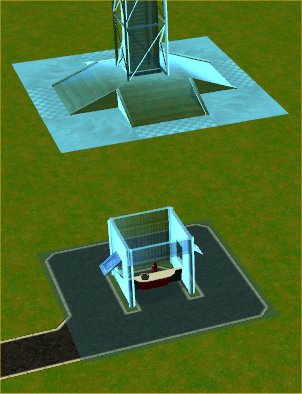
Once it is built, your
scenery item will be in the correct
place, surrounding the shop. Step 6:
Delete The Flat Ride
Now all you have to do is
delete the flat-ride, and put in place any
finishing touches required.
When you delete the flat
ride, the scenery item will remain. Here
I have placed a roof on top, and it is
done!
This method can also be used to place
structures high up, as it is easier to
change the height of the flat ride, than
it is when using the "place custom
structure" feature.
|